News that's on the level
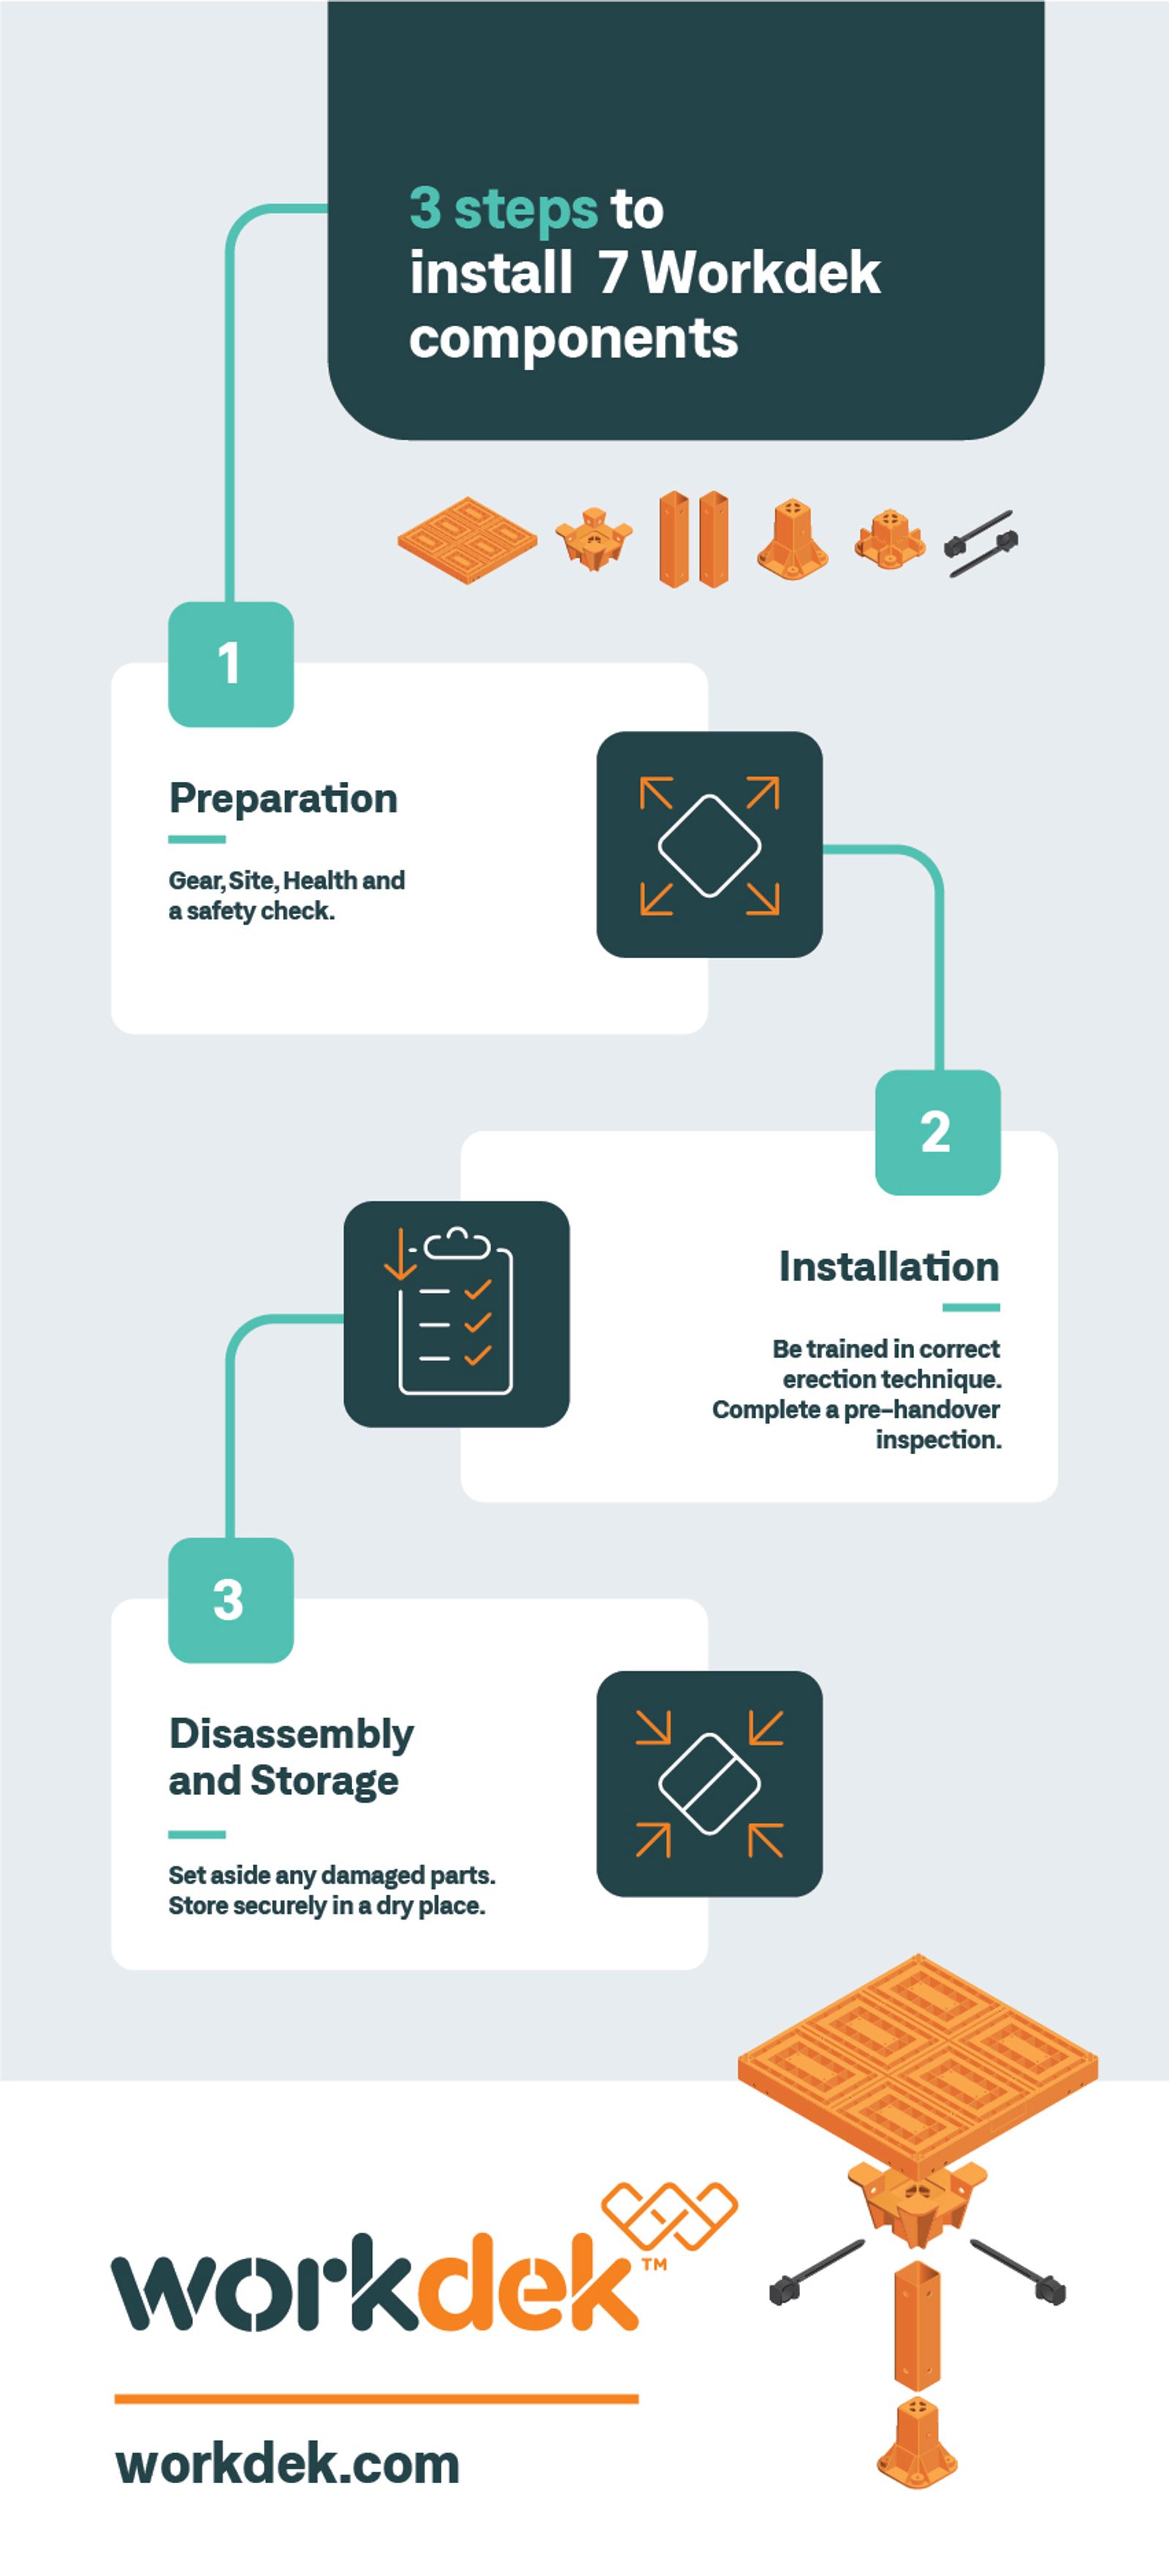
Installing Workdek in 3 Simple Steps
Oct 11th 2020
Workdek makes light work of building work. With Workdek you can work on stable ground at any height. Builders can move anywhere on a work site with full confidence knowing Workdek prevents any potential falls. When builders feel safe, they’re more productive. When builders are more productive, projects are more profitable.
Workdek Components
Our system is made out of injection moulded plastic panels that snap together with ease. Workdek is made up of 7 key components – the deck, legs, cradle, foot, spacer, safety pins, and straps. The Workdek components are lightweight and easy to install, yet are incredibly sturdy when assembled. Workdek can be configured for any building site; it’s as easy as 1, 2, 3. Let’s take a look at the three steps to install a Workdek platform on a building site.
Step 1: Preparation
First and foremost, you will need to be trained to safely install Workdek. Check that you have the correct information about your site; ensure that it is safe to work on and that all debris is removed. Wear the necessary protective gear too, and complete a risk assessment and Method Statement. Discuss the installation with your supervisor, line manager or site manager to ensure your Method Statement has been completed.
When unpacking Workdek, stack your panels, legs, base and head plates, securing pins, and cam/securing straps in the area where you intend to install the platform. Ensure you have all the necessary components before you begin the Workdek assembly.
Step 2: Installation
After all preparation is complete, you’ll need to make sure you have the correct Workdek erection technique to ensure safety at any height. It’s also crucial to know who your allocated first aid person is and how you can contact them should there be an emergency. While working your way through erecting Workdek, ensure you’re placing pins as you go to ensure stability. When reaching the adjacent walls you may need to create an overlap, which is perfectly fine.
After installation you’ll need to complete a pre-handover inspection which includes checking the secured pins, legs, securing straps, gaps no greater than 100mm, and that there’s no movement on the deck. As Workdek is not a freestanding system, it must be contained. Once you’re happy with Workdek’s stability, you may inspect it from above. You need to check for any faults, damage, and/or debris that could hinder a smooth building process.
For our detailed installation guide, click here.
Step 3: Disassembly & Storage
When uninstalling the Workdek system and returning components to their designated storage area, ensure there is no damage or defects. If you discover components that are damaged and/or defected, set them aside to avoid further use. Workdek components can be recycled.
Workdek panels can be safely stored 25-panels high. Make sure you secure these with strapping. Secure legs (with base and head plates left on) with strapping into 8x8 packs. Securing pins and cam/securing straps should be stored in suitable containers, in a dry place.
For our detailed storage guide, click here.
It’s time to step up with Workdek
Long gone are the days of counterproductive nets which don’t prevent falls, ensure safety, or increase profitability. Take the unnecessary risk out of construction and make the switch to the most reliable combined safety and work platform system on the market. Make light work of building work with Workdek.
With Workdek’s simple system you can build more and make more. To learn more and get yourself on solid ground with Workdek at any height, visit www.workdek.com or call 0800 3255 7233
 Back to news page